


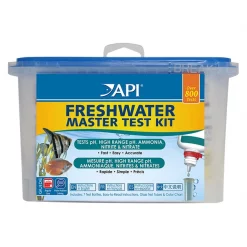


API Freshwater Aquarium Master Test Kit
Original price was: $21.05.$16.63Current price is: $16.63.
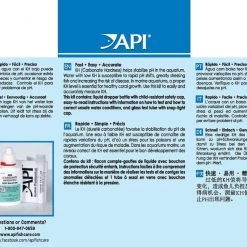
- Your questions, our prompt answers.
- Efficient and effective customer service, online.
- 100% environmentally friendly material
- 100% High Quality Guarantee

Details
- Specifically designed to measure, modify and balance the conditions of freshwater aquariums.
- Measures freshwater pH, high range pH ammonia, nitrate and water hardness.
- Includes 4 test tubes, a holding tray for testing bottles and a test tube rack.
- Helps protect your finned friends from toxic water conditions.
- Easy-to-follow instructions, simply compare your results to the color card.
Quickly measure and modify the six aquarium levels that are most important to the health of your freshwater fish with the API Freshwater Aquarium Master Test Kit. To stay healthy and thrive, fish need properly balanced levels of ammonia, pH, high range pH, nitrite and nitrate. These levels can change rapidly and create harmful conditions when fish waste, uneaten food or other organic matter accumulate, or when untreated water is added. The API Freshwater Aquarium Master Test Kit measures these six parameters with scientific accuracy and provides professional results. It comes with four test tubes, a holding tray, a test tube rack and a computer calibrated, laminated color card. Just fill the test tubes, add the test drops and compare results to the color card. Then follow the recommendations on the card if action is required.
Specifications
| Item Number | 94353 |
|---|---|
| Aquarium Type | Freshwater |
| Aquarium Concern | New Aquarium and Regular Care |
| Fish Type | Tropical Freshwater, Cichlid, Goldfish, Betta, Bottom Feeder |
What’s Included
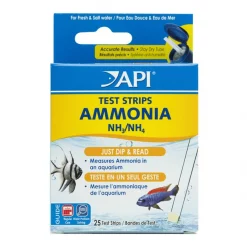
Low range pH, high range pH, ammonia, nitrite, nitrate, (4) test tubes with snap-tight caps, a test instruction booklet with color charts. Refills available for Ammonia, Nitrite & Nitrate and pH.
Precautions
HAZARDS TO HUMANS AND ANIMALS: Suspected of causing genetic defects. May be corrosive to metals. Harmful if swallowed. Causes severe skin burns and eye damage. Harmful if inhaled. Causes serious eye damage. Harmful to aquatic life. Use only in outdoors or in a well-ventilated area. Do not breathe dust, fume, gas, mist, vapors, spray. Do not eat, drink or smoke when using this product. Wear protective gloves, protective clothes, eye protection, face protection. Keep only in original container. Avoid release to environment.
FIRST AID: IF IN EYES: Rinse cautiously with water for several minutes. Remove contact lenses, if present and easy to do. Continue rinsing. If eye irritation persists, immediately call a Poison Center, Doctor, Physician, or first aider. IF SWALLOWED: Rinse mouth. Do not induce vomiting. Call a poison center, doctor, physician, or first aider if you feel unwell. IF ON SKIN OR HAIR: Immediately take off all contaminated clothing. Rinse skin with water or shower. Wash with plenty of water and soap. Wash contaminated clothing before reuse. Absorb spillage to prevent material damage. IF INHALED: Remove person to fresh air and keep comfortable for breathing. Store locked up. Store in a well-ventilated place. Keep container tightly closed. Dispose of contents or container to authorized chemical landfill or if organic to high temperature incineration.
Instructions
Directions for Testing Low Range pH
NOTE: Read instructions thoroughly before testing. DO NOT allow Test Solutions to get into aquarium or pond.
To remove childproof safety cap: With one hand, push red tab left with thumb while unscrewing cap with free hand.
- Fill a clean test tube with 5 ml of water to be tested (to the line on the tube).
- Add three drops of Indicator Solution, holding dropper bottle upside down in a completely vertical position to ensure uniformity of drops.
- Cap the test tube and invert tube several times to mix solution. DO NOT hold finger over open end of tube, as this may affect the test results.
- Determine the pH reading by matching the color of the solution against those on the pH Color Chart. The tube should be viewed against the white area beside the color chart. Color comparisons are best made in a well-lit area. The closest match indicates the pH of the water sample. Rinse the test tube with clean water after each use.
Directions for Testing High Range pH
Read thoroughly before testing. DO NOT allow Test Solutions to get into aquarium.
To remove childproof safety cap: With one hand, push red tab left with thumb while unscrewing cap with free hand.
- Fill a clean test tube with 5 ml of water to be tested (to the line on the tube).
- Add five drops of Indicator Solution, holding dropper bottle upside down in a completely vertical position to ensure uniformity of drops.
- Cap the test tube and invert tube several times to mix solution. DO NOT hold finger over open end of tube, as this may affect the test results.
- Determine the pH reading by matching the color of the solution against those on the High Range pH Color Chart. The tube should be viewed against the white area beside the color chart. Color comparisons are best made in a well-lit area. The closest match indicates the pH of the water sample. Rinse the test tube with clean water after each use.
Recommended pH Levels
A pH of 7.0 is ideal when keeping a community aquarium containing a variety of tropical fish. Goldfish should be kept in their own aquarium and prefer a pH of 7.5. Many Amazonian fish, like angelfish and neon tetras, prefer a pH of 6.5 to 6.8. Mollies and swordtails thrive at a pH 7.2 to 7.5.
Frequency of Testing
The pH should be tested weekly, since natural materials in the water (such as fish waste and decaying food) can cause pH changes.
Directions for Testing Ammonia Levels
- Fill a clean test tube with 5 ml of water to be tested (to the line on the tube).
- Add 8 drops from Ammonia Test Solution Bottle #1, holding the dropper bottle upside down in a completely vertical position to ensure uniformity of drops added to the water sample.
- Add 8 drops from Ammonia Test Solution Bottle #2, holding the dropper bottle upside down in a completely vertical position to ensure uniformity of drops added to the water sample.
- Cap the test tube and shake vigorously for 5 seconds. DO NOT hold finger over the open end of the tube, as this may affect the test results.
- Wait 5 minutes for the color to develop.
- Read the test results by matching the test solution against the Ammonia Test Color Chart. The tube should be viewed against the white area beside the color chart. Color comparisons are best made in a well-lit area. The closest match indicates the ppm (mg/L) of ammonia in the water sample. Rinse the test tube with clean water after each use.
What the Test Results Mean
In new freshwater aquariums, the ammonia level may surge to 6 ppm (mg/L) or more, and then fall rapidly as the biological filter becomes established. The ammonia will be converted to nitrite (also toxic), then to nitrate. This process may take several weeks. Use Aquarium Pharmaceuticals Stress Zyme to speed up the development of the biological filter. In an established aquarium or pond, the ammonia level should always remain at 0 ppm (mg/L). The presence of ammonia indicates possible overfeeding, too many fish, or inadequate biological filtration.
The ammonia level is not an indication of the nitrite level; Nitrite is another toxic waste material, which must be tested separately.
Monitoring Ammonia Levels
Regular testing is necessary to make sure the ammonia level is safe. Aquarium and pond water should be tested for ammonia every other day when it is first set up, and once a week after the biological filter has been established (in about 4 to 6 weeks).
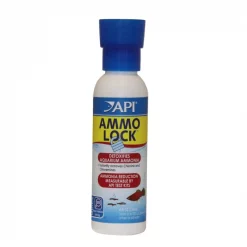
Detoxifying Ammonia Using Ammo-Lock
To detoxify ammonia, use Aquarium Pharmaceuticals Ammo-Lock to instantly lock up ammonia. Ammo-Lock does not remove ammonia; it simply converts toxic ammonia to a nontoxic form. Ammonia test kits will still test positive for ammonia, even though it is nontoxic. The biological filter will then consume the nontoxic ammonia, converting it to nitrite and then to nitrate.
Directions for Testing Nitrite
- Fill a clean test tube with 5 ml of water to be tested (to the line on the tube).
- Add 5 drops of Nitrite Test Solution, holding dropper bottle upside down in a completely vertical position to ensure uniformity of drops added to the water sample.
- Cap the test tube and shake the tube for 5 seconds. DO NOT hold finger over the open end of the tube, as this may affect test results.
- Wait five minutes for the color to develop.
- Read the test results by matching the color of the solution against those on the Nitrite Test Color Chart. The tube should be viewed against the white area beside the color chart. Color comparisons are best made in a well-lit area. The closest match indicates the ppm (mg/L) of nitrite in the water sample. Rinse the test tube with clean water after each use.
What The Test Results Mean
In new freshwater aquariums, the nitrite level will gradually climb to 10 ppm (mg/L) or more. As the biological filter becomes established (in 4 to 6 weeks), nitrite levels will drop to 0 ppm (mg/L). In an established pond or aquarium, the nitrite level should always remain at 0 ppm (mg/L). The presence of nitrite indicates possible overfeeding, too many fish, or inadequate biological filtration.
Monitoring Nitrite Levels
Regular testing for nitrite is an essential part of routine maintenance. Water should be tested for nitrite once a week to make sure the nitrite does not reach undesirable level.
FAQ
Why test pH?
pH is the measure of acidity in your water. A pH reading of 7.0 is neutral, a pH higher than 7.0 is alkaline, and a pH lower than this level is acidic. It is important to keep your aquarium at the appropriate pH level to ensure optimal water quality for your specific fish species, as different types of fish require different pH levels for their habitats. API FRESHWATER MASTER TEST KIT will enable you to test the pH levels in your water as often as needed!
Why test for Ammonia?
Fish continually release ammonia directly into the water through their gills, urine, and solid waste. Uneaten food and other waste also add ammonia to the water. A natural way that your aquarium handles this ammonia is through the biological filter, or natural aquarium cycle. However, as with any natural processes, imbalances can occur. This is why it’s important to regularly test for the presence of ammonia, which can spike unexpectedly in your aquarium. As soon as it is detected, ammonia should be removed, otherwise it will damage your fish’s gill membranes and harm their respiration, which can eventually result in fish death. Even small amounts of ammonia stress fish, suppressing their immune systems and increasing the likelihood of disease outbreaks. You can remove ammonia from your tank by performing a partial water change, and by dosing with a solution specifically designed to treat ammonia. Test frequently for high ammonia using API FRESHWATER MASTER TEST KIT.
Why Test for Nitrite?
Testing for the presence of toxic nitrite is essential, so that if it is detected, steps can be taken to remove it. If left untreated, nitrite in the water will hinder normal fish respiration, eventually leading to fish death. Even small amounts or low levels of nitrite stress fish, suppressing their immune systems and increasing the likelihood of disease, which is why it’s important to test for nitrite using API FRESHWATER MASTER TEST KIT. You can remove nitrite from your tank by performing a partial water change.
| Size | 800 count |
|---|
Be the first to review “API Freshwater Aquarium Master Test Kit”
Related products
Brushes & Cleaners
Algaecides & Water Clarity
Reviews
There are no reviews yet.